In my JavaOne 2017 session on Node.js Development with NetBeans, my last demo showed how you can use Apache NetBeans to develop and debug locally AWS Lambda functions. If you aren’t familiar, AWS Lambda functions are a “Function as a Service” (FaaS). You write a block of code and upload it to AWS and it executes in response to an event which can be a web service call (via API-Gateway), database update (DynamoDB), S3 bucket event, etc. The first million executions of your function are free! It ties into the rest of the AWS ecosystem which is their real power – for example, authentication and authorization is handled before your function gets executed.
Up until now, debugging AWS Lambda functions was a challenge and you were pretty much stuck doing print statements. A couple of months ago, Amazon announced SAM Local which leverages Docker, allowing you to test locally. The functions can use services in the cloud, for example talk, make changes to DynamoDB databases on Amazon (not locally).
If you are arriving at this blog entry not familiar with Apache NetBeans, NetBeans is an IDE that has been around for a number of years. Although initially it was developed as a Java IDE, a significant investment in support for JavaScript has been made over the last five-plus years. It boasts support for ECMAScript 5, 6, and 7. Recently, Oracle has donated it to the Apache foundation which means that it is now fully open source with the open source community driving development. The sad thing is that many developers working with JavaScript don’t know about it.
To get started with NetBeans and locally testing AWS Lambda function, you’ll need to setup a few things first:
- Install NetBeans (go with the full edition, may need to install Java 8)
- Install Node.js
- AWS Command line tools (installed and setup)
- Install Docker
- Install SAM
- npm install -g aws-sam-local
These instructions have been tested on MacOS X Sierra and High Sierra. Linux setup should be the same. I have not tried Windows.
NetBeans Setup
Before we can create a Node.js project, we need to tell NetBeans which Node.js installation we want to use. This Node.js installation won’t be used to actually run the function, but NetBeans will use it for code completion and npm support.
- Start NetBeans
- Choose NetBeans | Preferences
- Choose HTML/JS
- Select Node.js tab (all the way to the right)
- Click Search or manually enter in the Node Path and npm path. Also click on Download to download the Node.js sources (required.
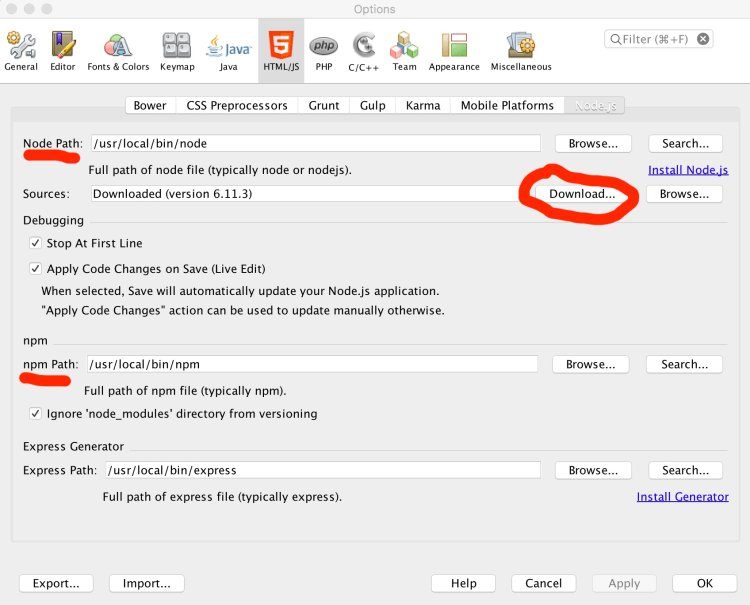
Click ok once you are done.
Node.js Project
Now let’s create a new Node.js project. Although I will create one from scratch, you can also use the project dialog to create a project with existing sources.
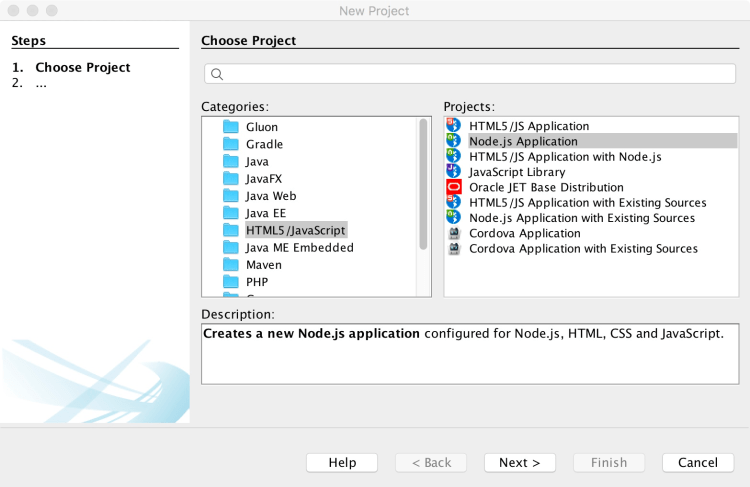
- Choose File | New Project
- Select “HTML5 / JavaScript”
- Choose Node.js Application
- Click Next
On the next screen, pick a name for your project and also select where you want the sources.

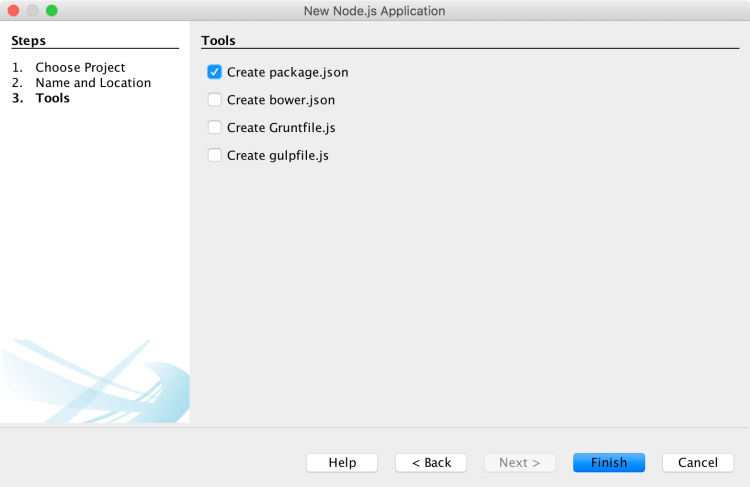
On the last screen, make no changes. We will use npm for managing dependencies.
Node.js Project Setup
After clicking “Finish” NetBeans will create the project as seen in the screen capture below. The IDE will open main.js by default.
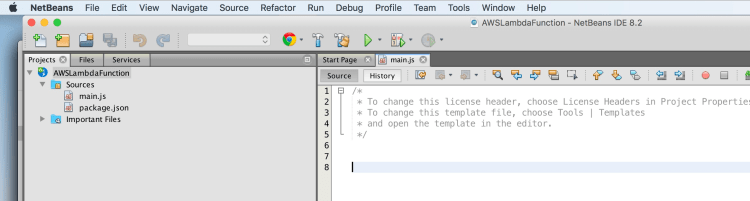
The first thing we will need to do, is add the dependency on the AWS JavaScript library. We could either edit the package.json directory, or we can use NetBeans to insert it and also run npm to download the dependency.
Either right click on the Project (AWSLambdaFunction in the screenshot above) and choose Properties or choose File | Project Properties. When the dialog opens, select npm under JavaScript Libraries.
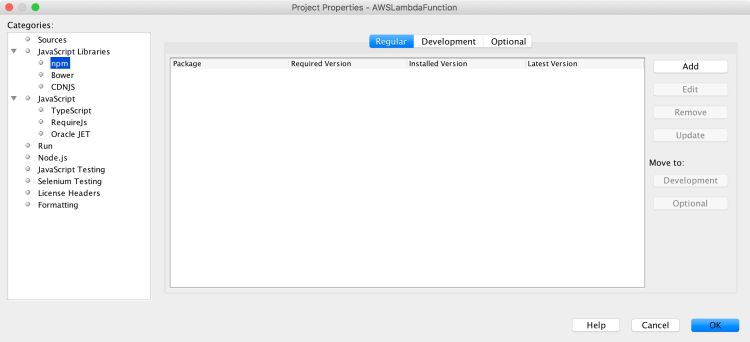
Click “Add” and search for “aws-sdk”.

After clicking “Add” and closing out Project Properties, NetBeans may ask you about syncing package.json – select “Yes.” In the background, NetBeans will download this dependency using npm.
Change the contents of the main.js to the following:
'use strict';
exports.handler = (event, context, callback) => {
    let id = event.pathParameters.product || false;
    switch (event.httpMethod) {
        case "GET":
            if (id) {
                callback(null, {
                    statusCode: 200,
                    body: "This is a READ operation on product ID " + id
                });
                return;
            }
            callback(null, {
                statusCode: 200,
                body: "This is a LIST operation, return all products"
            });
            break;
        case "POST":
            callback(null, {
                statusCode: 200,
                body: "This is a CREATE operation"
            });
            break;
        case "PUT":
            callback(null, {
                statusCode: 200,
                body: "This is a UPDATE operation on product ID " + id
            });
            break;
        case "DELETE":
            callback(null, {
                statusCode: 200,
                body: "This is a DELETE operation on product ID " + id
            });
            break;
        default:
            // Send HTTP 501: Not Implemented
            console.log("Error: unsupported HTTP method (" + event.httpMethod + ")");
            callback(null, {statusCode: 501});
    }
};
This is a simple service from one of the AWS examples. Next we have to define a configuration file for SAM. To do this, select File | New File and type in yaml into the search to quickly find the template.
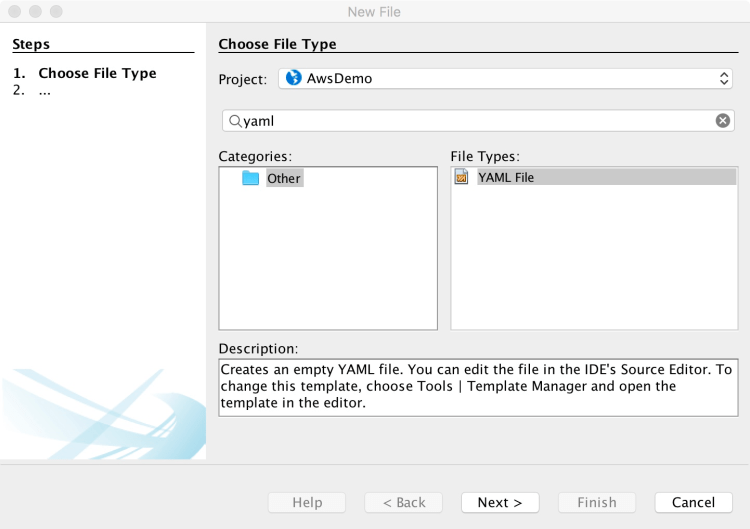
Click next and give the file the name of template.
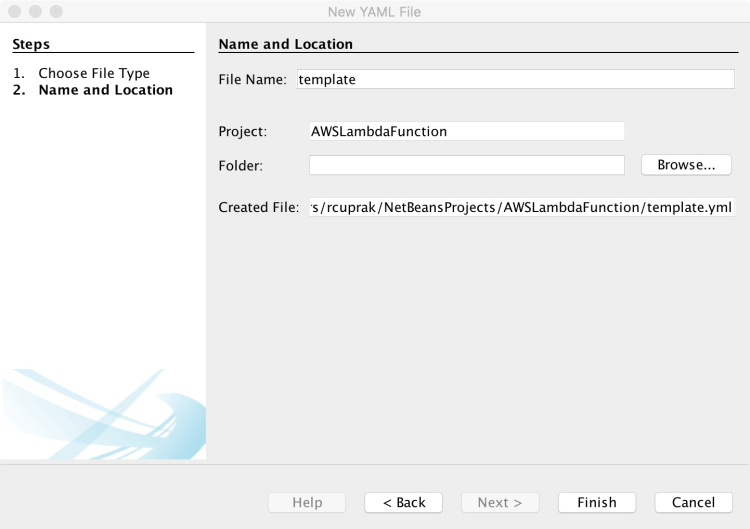
The editor will open with this file. You will need to add the following content:
AWSTemplateFormatVersion : '2010-09-09'
Transform: AWS::Serverless-2016-10-31
Description: JavaOne Demo

Resources:
  Products:
    Type: AWS::Serverless::Function
    Properties:
      Handler: main.handler
      Runtime: nodejs6.10
      Events:
        ListProducts:
          Type: Api
          Properties:
            Path: /products
            Method: get
        CreateProduct:
          Type: Api
          Properties:
            Path: /products
            Method: post
        Product:
          Type: Api
          Properties:
            Path: /products/{product}
            Method: any
Now, you are ready to run it.
- Choose Windows | IDE Tools | Terminal
- Navigate to your project directory (I think it puts you at the root)
- Type the following to run your function:
- sam local start-api -d 5858
At this point your function is running and it is time to debug it. Although we’ve started it in debug mode, we can’t debug it just yet. We have to invoke the function in order at which point the Node.js environment will wait for the debugger to connect.
So, browse to http://localhost:3000/products
In NetBeans, choose Debug | Attach Debugger. Set the hostname as localhost and the port as 5858.
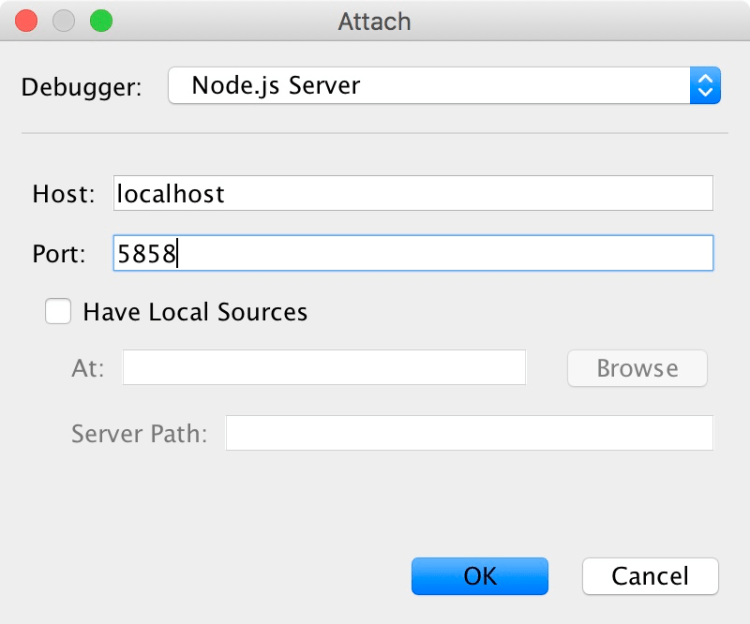
Click “OK” – you are now debugging!
Now, although you have the source locally, you won’t be setting breakpoints in your local code. You’ll need to set breakpoints in the copy of the code NetBeans retrieves from the server. Look for this line and set a break point:
handler(event, context, callback);
When the debugger stops on this line, step into it and you’ll be in your code.
Couple of key things:
- You’ll have to re-attach the debugger every time you invoke the function
- You’ll have to reset your breakpoints on each invocation otherwise they will be skipped.
Although this isn’t perfect, it is definitely an improvement!
Note: The debugging challenges might be do to a mismatch in the Node.js environment SAM is using versus the one setup for NetBeans. I have more experimentation to try to flush this out.

You must be logged in to post a comment.